Thanksgiving Pie-stravaganza P.2: The Pumpkin Pie

I’m sure I’ve mentioned this before, but pumpkin ranks in my top 3 pies of all time. Top two, really. Peach and Pumpkin are my all-time fave pies, and it’s not just because of alliteration (it’s not NOT because of alliteration though).

IMG_1951

Pumpkin pie is actually quite easy to make, but I do believe it is much better with a fresh pumpkin. There’s nothing wrong with canned pumpkin, but now that I know how good the fresh stuff is the canned just can’t quite live up to my expectations.

IMG_1952

A few years ago, the first year that I had my CSA, I was introduced to the long pie pumpkin. It’s a pumpkin, but it doesn’t look like most pumpkins – it’s long and cylindrical, rather than round. I was told it makes the best pies, and I’ve had no complaints. This year I brought one long pie pumpkin and one regular sugar pie pumpkin home with me to Sarnia to use for my pies. Yes, I travel with pumpkins, what’s it to you?

IMG_1985

I find the easiest way to cook the pumpkin is to steam it on the stovetop. Roasting it would be fine also, but it will take much longer. Once it is cooked through you just let it cool a bit, peel off the skin, and mash with a fork or a potato masher. It will never be as pureed as the canned stuff – but trust me, its a good thing.

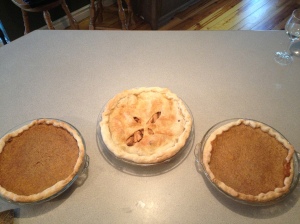
pay no attention to the pie in the middle.

pay no attention to the pie in the middle.

My basic pumpkin pie recipe comes from The Joy of Cooking. It’s a classic, and you can’t go wrong. I never pre-bake my pie shells because I’m lazy and I find they don’t need it. But if you are a perfectionist who cares a lot about soggy bottom crusts then maybe you’d want to – to each their own.

Pumpkin Pie – adapted from The Joy of Cooking. Makes 1 pie, I doubled it and made two.

  • 2 cups pumpkin or squash puree
  • 1 can of evaporated milk (about 1 1/2 cups) or heavy cream.
  • 1/3 cup white sugar
  • 1/3 cup brown sugar
  • 1 teaspoon cinnamon
  • 1/2 teaspoon ground cinnamon
  • 1/2 teaspoon nutmeg
  • 1/4 teaspoon allspice
  • the tiniest pinch of ground cloves
  • 1/2 teaspoon salt
  • 2-3 large eggs (2 makes a firmer pie, 3 a softer, custardy filling – since I doubled the recipe I used 5 for a happy middle)
  • pastry for one single-crust pie

Roll out your pie crust and place into glass pie pan. Trim and crimp edges, chill in the fridge or freezer while you prepare the filling. Preheat your oven to 375. Whisk the eggs and add in the pumpkin and evaporated milk. Add remaining ingredients and combine. Pour into chilled pie shell. Bake 35-45 minutes or until a knife inserted comes out clean – it may still be a big jiggly in the middle but that’s okay, it will continue to cook in the pan after you remove it from the oven. Let cool completely. If made ahead, refrigerate, but you can bring it up to room temperature before serving. Hide a piece somewhere so that you can have a second piece with your coffee the morning after Thanksgiving – you deserve it.


Thanksgiving Pie-stravaganza P.1: The Butter Tarts

I made so much pie at Thanksgiving. I realize it’s been literally months since Thanksgiving ended here in Canada (though certainly less for any Americans out there!) but let’s not get into that.

Let’s get into BUTTER TARTS.

IMG_1959

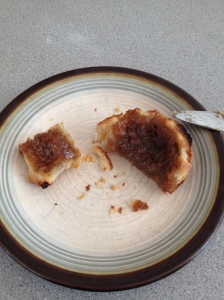
Butter tarts are a Canadian delicacy. I’ve wanted to make them since the start of this project, but figured I would wait until a time of year when there was less amazing seasonal Ontario fruit to use up, since butter tarts really only require butter and sugar. If you haven’t had a butter tart before (you again, are you American?) you can just imagine it as a miniature pecan pie, without the nuts. It’s a caramelized sugar custard pie. I don’t really have a sweet tooth (probably surprising for a pie blogger) and butter tarts do send my blood sugar skyrocketing, but they are a thing I love.

IMG_1955

Thanksgiving at my family’s house is always a big deal, at least it has been for the past several years. Since about 2008 my aunt, uncle, and cousins who all live in the U.S. come up for Canadian Thanksgiving to celebrate with us and have a visit. This year, for the first time, another bunch of cousins and family from my mom’s side came as well – we had about 15 people at our house for Thanksgiving. It was really fun. My uncle Phil, who is from the U.S. clan, is French-Canadian and grew up in Northern Ontario. When I told my mom that I was thinking about making butter tarts at Thanksgiving she told me that Phil always buys butter tarts when he’s in Canada because he loves them so much, so this would be way better.

IMG_1957

The thing about most butter tarts out there – much like most pecan pie – is that they are made with corn syrup. Now it is true that corn syrup is just about the worst kind of sweetener out there, health-wise. And that is a concern of mine. But worst of all, for me, is that corn syrup really has no flavour. It’s just sweet. There’s no depth. I don’t use it in my pies, that would be a disservice to pie everywhere. If a recipe calls for corn syrup, I always use maple syrup. Real maple syrup. Put it in your butter tarts, put it in your pecan pie. You won’t be sorry.

IMG_1961

Butter Tarts – recipe adapted from Anna Olson. Makes 12. I doubled it and made 24. So many butter tarts. 

  • one double crust batch of pastry.
  • 3/4 cup dark brown sugar.
  • 3/4 cup real maple syrup.
  • 1/2 cup salted butter, melted.
  • 2 large eggs.
  • 1 tsp. lemon juice (or white vinegar).
  • 1 tsp. vanilla extract.
  • OPTIONAL: raisins or nuts or other accoutrements, if you’re into that kind of thing in your butter tarts.

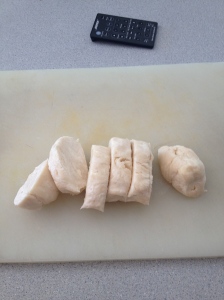
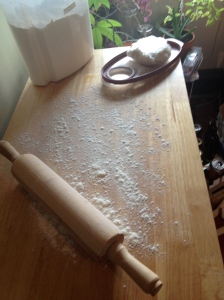
For the pastry: Instead of flattening your pastry into a round disc before chilling (the way you would do for a pie), roll it into two logs. Wrap in plastic wrap and chill for an hour or more. When chilled, slice each log into six even rounds. Each of these slices will make the crust for one butter tart. Flour your counter and roll out each small round – your crust will be thicker than it would normally be for pie. Transfer dough to a muffin pan and line the inside of one muffin spot with pastry. You want the dough to extend a centimetre or so above the pan, because your butter tarts filling will expand as it cooks. Trim off excess dough. Repeat with remaining pastry. Put the whole muffin pan with pastry into the fridge (or better, the freezer!) and chill again. Preheat the oven to 400.

IMG_1969

Melt butter and sugar together in a saucepan on medium heat. Remove from heat and whisk in maple syrup. Whisk in eggs, then vanilla and lemon juice. If you are adding raisins or nuts to your tarts, place them in the bottom of each pastry shell before adding filling. I made 24 tarts and made 12 with raisins and 12 without anything added. For the raisin ones I meticulously counted out 8 Thompson raisins and added them to each shell. Pour the filling into the pastry shells, filling about 2/3 of the pastry. Bake at 400 for 5 minutes, then reduce the oven temperature to 375 and bake for another 20 minutes or so, until the filling begins to dome. Remove from oven and set the pans on a cooling rack. After 5 minutes, run a butter knife around the edge of each tart to loosen them from the pan. Let cool before removing from the pan. Store in the fridge, but bring up to room temperature before serving. Have with a cup of strong black coffee for the ultimate yum.

Apple Galette.

Let’s skip past the part where you tell me I’m 9 weeks behind in my blogging. I stopped blogging right at the same time as I started working 6 days a week, so let’s just let that all slide, mmkay? I’ve still been baking though, always. Comfort yourself with the fact that there are tons of pies for you to catch up on very soon. There is one glitch though – I made this pie before Thanksgiving, and then I made a full-on apple pie for Thanksgiving festivities.  The problem with that is that now I don’t know how to write about this pie without mentioning apple pie in general, but I’ve since made a regular apple pie as well and so feel I should save some of these apple pie thoughts for that pie post, you know?
IMG_1883
This is all rather confusing, so I will just say this for now: I don’t *get* apple pie.
As in, I don’t understand what all the fuss is about, I don’t know why people like it so much, don’t know how it somehow got to be like, the quintessential pie. I am not an apple pie person.
I made this galette because it was the end of the week and I hadn’t made a pie, and I’d gotten several apples in my CSA and figured I could make a small apple galette without having to pick up any groceries. I knew that I’d be making a full apple pie at Thanksgiving (for my family members who like it) and so I figured this was like a mini practice round. I’d never made an apple pie before, because it’s not my bag. I was sort of hoping that maybe I just didn’t like other people’s apple pies, or store-bought apple pies, and that when I made one I would find it delicious.
IMG_1884
This was not the case. I made a small apple galette, I ate a tiny piece, and then I accidentally left it out on the counter for several days and it got moldy. This is not the first time during this project that some pie has gone bad, but usually its like, one rogue piece leftover in the back of the fridge that I’ve forgotten about, not A WHOLE PIE. I hate wasting food, and I also know many people who would probably have enjoyed eating that pie, but I can’t change the past!
Apple Galette – recipe by me
  • one single crust pastry
  • 4-6 apples, depending on size
  • 5-6 tablespoons of sugar
  • cinnamon, nutmeg, ginger – warm spices of your choice
  • 1 tbsp. lemon juice
  • egg for egg wash (optional)
  • coarse sugar to sprinkle on crust (optional)

IMG_1885

Peel and slice your apples. Toss with spices and sugar and lemon juice. Roll out your pastry and transfer to a parchment lined baking sheet. Pile your apple mixture into the middle of the dough and then fold up sides to close up edges. Brush with egg and sprinkle with sugar. Bake at 400 for approximately 45 minutes.  Enjoy with coffee, if you’re into this whole apple pie thing.

IMG_1886