All The Pie.

I am a very bad blogger. We may as well face facts.

I’ve been baking up a storm, and have been continuing to make (and eat) a pie a week. But I don’t always feel moved to write about them. Or I find myself strapped for time. There are a million excuses. But also? Maybe I don’t want to tell every detail about every pie right here as it happens. Maybe I want to make some of them again, perfect the recipes, take note of measurements and weights. Maybe I don’t, but maybe I do. Maybe this would make a good cookbook. Maybe I want to play with this project a little, curate it a little better rather than just tossing it all onto the internet as soon as I’ve thrown some food together.

But the truth is, this was always meant to be a personal challenge of making one pie a week for one year. My grandmother never intended it to be a blogging project. She wouldn’t even have known what a blog was.

I only have eight more pies to make. Eight! That seems crazy to me, this year has flown by so quickly. I’m not sure how I will tell you about the last eight pies. But I don’t want to leave you hanging on the past 15 either, so I’m going to give you a little round-up here. This is the kind of thing that would probably be better suited to Tumblr, but oh well.

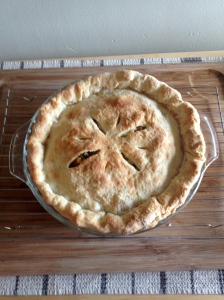
Apple Pie: a classic pie, beloved by many. I don’t like apple pie at all, I don’t get it, I don’t like it even a little bit, even when it’s made well.

IMG_1984

Pumpkin Pie Part Two (Canned Pumpkin): Because I can’t get enough of pumpkin pie, I made another one post-Thanksgiving, this time with canned pumpkin. In doing this I solidified my opinion that it’s never as good with canned pumpkin – it’s too smooth, no texture, too much like baby food.

IMG_2086

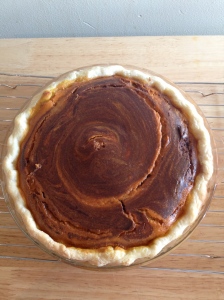
Chocolate Pumpkin Pie: Yet another pumpkin pie, but this time with melted dark chocolate swirled into the pumpkin filling. It was crazy – it tasted like a autumn spiced chocolate cheesecake. Too rich for my blood, but definitely delicious.

IMG_2120

Curry Pot Pie: I fell deep, so deeply, in love with this pie. I’ve made it again. Essentially just curry powder added to a standard veggie pot pie filling, and it was incredible. I’m waiting for a chance to make this with chicken – who wants to have me over? And yes, I spelled “pot pie” with pastry. What’s it to you?

IMG_2168

Potato Leek Galette: This pie was whatever. I took inspiration from potato leek soup and from what was in my fridge (i.e. potatoes and leeks) and added some shredded good gruyere. It was very tasty, but we ate it as a main course and I think it would really shine as a side dish at brunch next to some eggs. Also: rainbow potatoes!

IMG_2197

Blood Orange Pie: I started thinking about lemon meringue pie, and how I wondered if you could do a grapefruit meringue (why not?). Citrus season had just begun and I had been getting these really great blood oranges from the U.S. but then due to both laziness and curiosity I ended up making a different kind of citrus pie. One where you just cut off all the membranes from the oranges, arrange them on your pastry, sprinkle with a small amount of sugar, and bake. It was kind of like marmalade pie, in a great way. I loved it.

IMG_2236

Swiss Chard and Feta Galette: This was kind of like spanakopita, but made with swiss chard rather than spinach. I often find spinach/feta pastries too rich, but for some reason this wasn’t. It was really good, and definitely one of my absolute favourite pies that I’ve made.

IMG_2286

Egg Nog Pie: This pie was weird. Since custard pie is a thing, and egg nog is basically custard, I thought why not make a Christmas-y egg nog pie? Basically a custard pie but with some nutmeg, a little bit of bourbon or dark rum in the filling? It was okay, kind of weird. It took forever to bake, and I learned why you should be blind baking crusts when you have such a liquidy filling (they buckle and look ugly plus will be even more soggy bottomed than normal). I wasn’t really into it, but it was an experiment! Also, because the baking was frustrating, I forgot to take a photo of the finished pie.

IMG_2312

Mushroom, Eggplant, and Ricotta Galette: I made this pie for a lunch hangout with my girl Jocelyn (you should really click that, she takes beautiful photos). Roasted Eggplant, sautéed mushrooms, and a smear of ricotta. I’m really into eggplant. This pie was great.

IMG_2333

Kale and Sweet Potato Pie: This was kind of a “use up the stuff in the fridge before going away” pie. Also a “you’re supposed to eat one dark green and one orange vegetable a day” pie. It was sort of like a quiche, because I beefed up the filling with eggs. Mashed sweet potato with kale in an eggy filling that was mildly curry-spiced. It was weird, but not bad.

IMG_2371

Vegetarian Tourtière: Vegetarian tourtière?! That doesn’t even make sense! But it did, and it was great. The filling was roasted chestnuts and mushrooms, with all the other great seasonings of a traditional québecois meat pie. I had this on Christmas day (I know, I know, Christmas Eve is the true tradition) and it was awesome.

IMG_2438

Classic Tourtière: Oh, don’t worry. We made a meat tourtière too. From my French-Canadian Uncle Phil’s faded, tattered, hand-written recipe. It was awesome too.

IMG_2439

Veggie and Meat Tourtière together at last.

Veggie and Meat Tourtière together at last.

Curry Pot Pie: Again, for a good friend’s birthday dinner. I’ll spare you the photos.

Gluten-Free Kale, Roasted Red Pepper, and Feta Pie: I tried to make a gluten-free pie! A friend who is GF was coming over and I was all like “challenge: accepted!”. I was feeling a little hot-shotty, actually. Gluten free pie is hard! Gluten is really stretchy, and GF pastry has like, zero elasticity. It came together and rolled out fine, but then I couldn’t get it off the counter. I ended up packing it back up into a ball, and then rolling it out on the parchment that I baked it on. This was a galette, so it worked, but I’m not sure how it would work for a regular pie. I’m enough of a perfectionist that I’ll try my hand at this again. Apparently I’m a fool who forgot to take photos of this pie. D’oh!

Broccoli and Cheddar Quiche: A Classic. For Sunday brunch, and I added in some parmesan as well, and the whole thing was great.

Broccoli Quiche, in process.

Broccoli Quiche, in process.

Well friends, that’s it. Those are the pies I’ve been making and eating for the past several months. Like I said, I have only eight more pies to make until I’m done this whole pie-a-week-for-a-year thing. Thanks for reading!

Thanksgiving Pie-stravaganza P.2: The Pumpkin Pie

I’m sure I’ve mentioned this before, but pumpkin ranks in my top 3 pies of all time. Top two, really. Peach and Pumpkin are my all-time fave pies, and it’s not just because of alliteration (it’s not NOT because of alliteration though).

IMG_1951

Pumpkin pie is actually quite easy to make, but I do believe it is much better with a fresh pumpkin. There’s nothing wrong with canned pumpkin, but now that I know how good the fresh stuff is the canned just can’t quite live up to my expectations.

IMG_1952

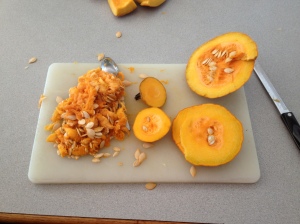
A few years ago, the first year that I had my CSA, I was introduced to the long pie pumpkin. It’s a pumpkin, but it doesn’t look like most pumpkins – it’s long and cylindrical, rather than round. I was told it makes the best pies, and I’ve had no complaints. This year I brought one long pie pumpkin and one regular sugar pie pumpkin home with me to Sarnia to use for my pies. Yes, I travel with pumpkins, what’s it to you?

IMG_1985

I find the easiest way to cook the pumpkin is to steam it on the stovetop. Roasting it would be fine also, but it will take much longer. Once it is cooked through you just let it cool a bit, peel off the skin, and mash with a fork or a potato masher. It will never be as pureed as the canned stuff – but trust me, its a good thing.

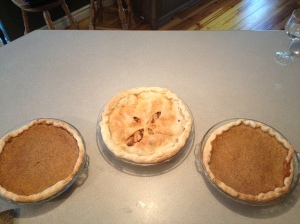
pay no attention to the pie in the middle.

pay no attention to the pie in the middle.

My basic pumpkin pie recipe comes from The Joy of Cooking. It’s a classic, and you can’t go wrong. I never pre-bake my pie shells because I’m lazy and I find they don’t need it. But if you are a perfectionist who cares a lot about soggy bottom crusts then maybe you’d want to – to each their own.

Pumpkin Pie – adapted from The Joy of Cooking. Makes 1 pie, I doubled it and made two.

  • 2 cups pumpkin or squash puree
  • 1 can of evaporated milk (about 1 1/2 cups) or heavy cream.
  • 1/3 cup white sugar
  • 1/3 cup brown sugar
  • 1 teaspoon cinnamon
  • 1/2 teaspoon ground cinnamon
  • 1/2 teaspoon nutmeg
  • 1/4 teaspoon allspice
  • the tiniest pinch of ground cloves
  • 1/2 teaspoon salt
  • 2-3 large eggs (2 makes a firmer pie, 3 a softer, custardy filling – since I doubled the recipe I used 5 for a happy middle)
  • pastry for one single-crust pie

Roll out your pie crust and place into glass pie pan. Trim and crimp edges, chill in the fridge or freezer while you prepare the filling. Preheat your oven to 375. Whisk the eggs and add in the pumpkin and evaporated milk. Add remaining ingredients and combine. Pour into chilled pie shell. Bake 35-45 minutes or until a knife inserted comes out clean – it may still be a big jiggly in the middle but that’s okay, it will continue to cook in the pan after you remove it from the oven. Let cool completely. If made ahead, refrigerate, but you can bring it up to room temperature before serving. Hide a piece somewhere so that you can have a second piece with your coffee the morning after Thanksgiving – you deserve it.


Thanksgiving Pie-stravaganza P.1: The Butter Tarts

I made so much pie at Thanksgiving. I realize it’s been literally months since Thanksgiving ended here in Canada (though certainly less for any Americans out there!) but let’s not get into that.

Let’s get into BUTTER TARTS.

IMG_1959

Butter tarts are a Canadian delicacy. I’ve wanted to make them since the start of this project, but figured I would wait until a time of year when there was less amazing seasonal Ontario fruit to use up, since butter tarts really only require butter and sugar. If you haven’t had a butter tart before (you again, are you American?) you can just imagine it as a miniature pecan pie, without the nuts. It’s a caramelized sugar custard pie. I don’t really have a sweet tooth (probably surprising for a pie blogger) and butter tarts do send my blood sugar skyrocketing, but they are a thing I love.

IMG_1955

Thanksgiving at my family’s house is always a big deal, at least it has been for the past several years. Since about 2008 my aunt, uncle, and cousins who all live in the U.S. come up for Canadian Thanksgiving to celebrate with us and have a visit. This year, for the first time, another bunch of cousins and family from my mom’s side came as well – we had about 15 people at our house for Thanksgiving. It was really fun. My uncle Phil, who is from the U.S. clan, is French-Canadian and grew up in Northern Ontario. When I told my mom that I was thinking about making butter tarts at Thanksgiving she told me that Phil always buys butter tarts when he’s in Canada because he loves them so much, so this would be way better.

IMG_1957

The thing about most butter tarts out there – much like most pecan pie – is that they are made with corn syrup. Now it is true that corn syrup is just about the worst kind of sweetener out there, health-wise. And that is a concern of mine. But worst of all, for me, is that corn syrup really has no flavour. It’s just sweet. There’s no depth. I don’t use it in my pies, that would be a disservice to pie everywhere. If a recipe calls for corn syrup, I always use maple syrup. Real maple syrup. Put it in your butter tarts, put it in your pecan pie. You won’t be sorry.

IMG_1961

Butter Tarts – recipe adapted from Anna Olson. Makes 12. I doubled it and made 24. So many butter tarts. 

  • one double crust batch of pastry.
  • 3/4 cup dark brown sugar.
  • 3/4 cup real maple syrup.
  • 1/2 cup salted butter, melted.
  • 2 large eggs.
  • 1 tsp. lemon juice (or white vinegar).
  • 1 tsp. vanilla extract.
  • OPTIONAL: raisins or nuts or other accoutrements, if you’re into that kind of thing in your butter tarts.

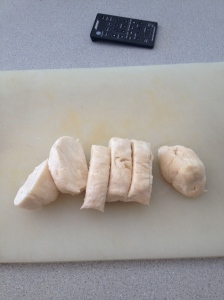
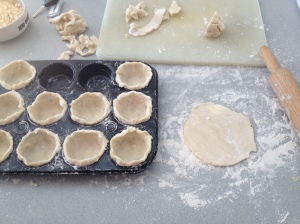
For the pastry: Instead of flattening your pastry into a round disc before chilling (the way you would do for a pie), roll it into two logs. Wrap in plastic wrap and chill for an hour or more. When chilled, slice each log into six even rounds. Each of these slices will make the crust for one butter tart. Flour your counter and roll out each small round – your crust will be thicker than it would normally be for pie. Transfer dough to a muffin pan and line the inside of one muffin spot with pastry. You want the dough to extend a centimetre or so above the pan, because your butter tarts filling will expand as it cooks. Trim off excess dough. Repeat with remaining pastry. Put the whole muffin pan with pastry into the fridge (or better, the freezer!) and chill again. Preheat the oven to 400.

IMG_1969

Melt butter and sugar together in a saucepan on medium heat. Remove from heat and whisk in maple syrup. Whisk in eggs, then vanilla and lemon juice. If you are adding raisins or nuts to your tarts, place them in the bottom of each pastry shell before adding filling. I made 24 tarts and made 12 with raisins and 12 without anything added. For the raisin ones I meticulously counted out 8 Thompson raisins and added them to each shell. Pour the filling into the pastry shells, filling about 2/3 of the pastry. Bake at 400 for 5 minutes, then reduce the oven temperature to 375 and bake for another 20 minutes or so, until the filling begins to dome. Remove from oven and set the pans on a cooling rack. After 5 minutes, run a butter knife around the edge of each tart to loosen them from the pan. Let cool before removing from the pan. Store in the fridge, but bring up to room temperature before serving. Have with a cup of strong black coffee for the ultimate yum.

Potato, Roasted Red Pepper and Goat Cheese Quiche.

Friends, this was my half-way pie.

IMG_1920

Now, I made this more than 2 months ago, which means I’m well past the halfway point of this project, but I’m way behind in my blogging. Because I’m such a terrible, no-good, very bad blogger, I’m going to speed through some of these pie posts so that you get the general idea of the pies without mad detail about every little ingredient.

IMG_1917

This is a quiche. It was a great quiche, maybe the best quiche ever. Pink potatoes and a red pepper from my CSA, both roasted until all perfect and delicious, chopped up and mixed with a perfect egg filling and a ton of goat cheese. Have it for brunch, have it for lunch, have it for dinner or anything in between.

IMG_1923

It definitely takes a bit of time because of all the roasting, but the payoff is great.

IMG_1926

Apple Galette.

Let’s skip past the part where you tell me I’m 9 weeks behind in my blogging. I stopped blogging right at the same time as I started working 6 days a week, so let’s just let that all slide, mmkay? I’ve still been baking though, always. Comfort yourself with the fact that there are tons of pies for you to catch up on very soon. There is one glitch though – I made this pie before Thanksgiving, and then I made a full-on apple pie for Thanksgiving festivities.  The problem with that is that now I don’t know how to write about this pie without mentioning apple pie in general, but I’ve since made a regular apple pie as well and so feel I should save some of these apple pie thoughts for that pie post, you know?
IMG_1883
This is all rather confusing, so I will just say this for now: I don’t *get* apple pie.
As in, I don’t understand what all the fuss is about, I don’t know why people like it so much, don’t know how it somehow got to be like, the quintessential pie. I am not an apple pie person.
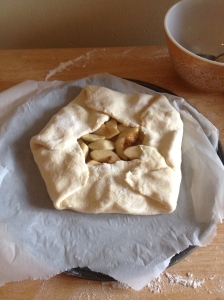
I made this galette because it was the end of the week and I hadn’t made a pie, and I’d gotten several apples in my CSA and figured I could make a small apple galette without having to pick up any groceries. I knew that I’d be making a full apple pie at Thanksgiving (for my family members who like it) and so I figured this was like a mini practice round. I’d never made an apple pie before, because it’s not my bag. I was sort of hoping that maybe I just didn’t like other people’s apple pies, or store-bought apple pies, and that when I made one I would find it delicious.
IMG_1884
This was not the case. I made a small apple galette, I ate a tiny piece, and then I accidentally left it out on the counter for several days and it got moldy. This is not the first time during this project that some pie has gone bad, but usually its like, one rogue piece leftover in the back of the fridge that I’ve forgotten about, not A WHOLE PIE. I hate wasting food, and I also know many people who would probably have enjoyed eating that pie, but I can’t change the past!
Apple Galette – recipe by me
  • one single crust pastry
  • 4-6 apples, depending on size
  • 5-6 tablespoons of sugar
  • cinnamon, nutmeg, ginger – warm spices of your choice
  • 1 tbsp. lemon juice
  • egg for egg wash (optional)
  • coarse sugar to sprinkle on crust (optional)

IMG_1885

Peel and slice your apples. Toss with spices and sugar and lemon juice. Roll out your pastry and transfer to a parchment lined baking sheet. Pile your apple mixture into the middle of the dough and then fold up sides to close up edges. Brush with egg and sprinkle with sugar. Bake at 400 for approximately 45 minutes.  Enjoy with coffee, if you’re into this whole apple pie thing.

IMG_1886

Squash and Caramelized Onion Galette.

This is a pie I’ve made before. I’ve even blogged about it before, way back here. It’s (perhaps unsurprisingly) a Smitten Kitchen recipe, and it really does taste like autumn in a pie. This time, however, I omitted something that I previously would have felt was in-omittable – the fresh sage. Now, I love fresh sage. It tastes like Thanksgiving and it goes so well with buttery things. But I also find it very overpowering, and sometimes I find it makes my tongue feel numb. Also, I don’t have a sage plant, and buying a pack of fresh sage to use only a few leaves seems so wasteful, so this time I just skipped it.

I did use dried sage, but it’s much subtler, and in some ways I really liked that.

IMG_1838

All you really need for this pie is a few onions, your pastry, a small squash and a good, hard cheese. Almost every time I’ve made this I’ve made it with a really firm gruyere – called Gruyere de Grotte – and it is delicious. But you can use any cheese you like!

Squash and Caramelized Onion Galette – adapted, ever so slightly, from Smitten Kitchen

  • one single crust pastry
  • one small squash of your choosing
  • 3 small or 2 large onions, sliced into half moons
  • fresh or dried sage, or other spices to your liking
  • 1/2 cup to 3/4 cup of cheese, cut into small cubes
  • butter or oil for sautéing
  • one egg, beaten, for egg wash (optional)

Peel your squash and remove the seeds, then cut it into 1 inch dice. Roast in a 400 degree oven until tender but not too soft. Meanwhile, melt butter in a pan (cast iron if you have it) and sauté your onions slowly over medium heat. Lots of recipes for caramelizing onions call for you to add a bit of sugar but this is unnecessary – it’s kind of cheating actually. I do it sometimes, but really I find that if you have the time to cook the onions slowly that they will release more of their own sugars and they will be so much better. Season the onions with salt and pepper and sage, or other spices. Cook until they are all soft and browned and delicious. Remove from heat and set aside. When your squash is done roasting, let it cool slightly so that it isn’t super hot when it goes onto your pastry.

IMG_1839

Roll out your pastry into a rough circle. Transfer to a parchment lined baking sheet. Pile your onions in a circle in the middle, followed by the squash and then the cheese. Fold up the edges of the pastry, brush with egg (optional) and bake at 375 for 30-40 minutes, until the crust is golden brown.

This is one of those times when I made something and forgot to take photos. Bad blogger! All I have is the photo of the squash and a bad photo of my onions in the pan. I can assure you though that the finished product was beautiful and delicious. You’ll just have to make it and see for yourself.

Tomato Corn Pie.

Guys, I’m almost halfway done this project. That seems crazy! It hasn’t even felt all that difficult so far, pie is just a part of my regular life routine now (which, by the way, is pretty great). This is my 23rd pie of this project. Technically it’s my 24th pie of this project, since you’ll remember that I made two peach pies, but I’m counting those as only one for the purposes of this. This means I have 3 more pies to make before I’m halfway. That will bring us basically right up to Thanksgiving, and you can expect some special Thanksgiving-related posts, to be sure.

IMG_1803

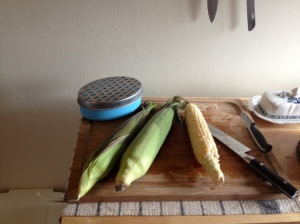
But back to this pie. I’ve looked at this recipe several times over the last three or four years, but never made it until yesterday. I always noticed it at the wrong time – it requires both fresh tomatoes and fresh corn, and sometimes I forgot about this recipe until the season for both had passed. Sometimes it was a year where corn and tomatoes didn’t really overlap much in Ontario – we’ve had some weird weather over the past few years, and some rough summers for farmers. Last week we got a lot of corn in our CSA and I had a end-of-summer harvest party to attend on Sunday evening, so it only made sense to pick up some tomatoes and make this happen.

IMG_1804

The dough in this pie is slightly different than normal pie crust – it’s more like a biscuit. It’s a little less buttery, a little less stretchy, but it’s perfect for this kind of pie. Because it’s also kind of a drier dough, I found that it was actually easy to roll it out if it wasn’t ice cold, which is kind of nice when you are trying to work quickly and don’t want to waste time chilling your dough. I was really organized making this pie – I had all my ingredients prepped and measured out before I made the dough, and so it came together really quickly when it came time to assembling. Perhaps a little too quickly – I realized a few hours later that I had forgotten an ingredient. This pie was supposed to have a lemony-mayonnaise sauce type thing that you pour on top before putting on the top crust. I love mayo, but this sounds pretty gross even to me, but it also wasn’t a huge amount of mayo and it was the only sauce-like substance in this pie, so I figured it would act as more of a binding agent than anything else. Well, I forgot it. And you know what? It totally didn’t need it. I’ll include it here for you to see anyways, but I think its unnecessary. If I wanted a sauce with this (which it doesn’t need) I think I’d be more likely to mix up a lemony-sour cream to dollop on top.

IMG_1806

I brought this to a Sunday evening potluck and I gotta say, it was a hit.

Tomato Corn Pie – adapted from Smitten Kitchen

Crust

  • 2 cups flour
  • 1 TBSP baking powder
  • 3/4 tsp. salt
  • 6 TBSP butter
  • 3/4 cup milk
  • 2 TBSP melted butter

Filling

  • 1/3 cup mayo mixed with 2 TBSP lemon juice (optional, i forgot it)
  • ~ 2 lbs. roma/plum tomatoes –  cored, peeled and sliced
  • 3 ears worth of cut corn
  • 5-10 leaves of basil, torn
  • 2 green onions, finely chopped
  • ~ 1 1/2 cups of grated cheddar
  • salt and freshly ground pepper

Make the crust the way you would with normal pastry – stir together the dry ingredients, cut in butter, then add the milk as your liquid, combining until it just forms a dough. Divide into two equal pieces.

IMG_1807

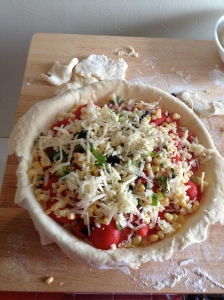
Roll out your bottom crust and pat into pie plate. Trim edges to leave 1 inch overhang. Layer half of the tomatoes around the bottom of the crust. Sprinkle with half the corn, half the basil, half the green onions, a shake of salt and a grind of pepper, and top with half the cheese. Repeat the layers, using up the rest of your tomatoes, corn, herbs, and cheese. If you are using the mayo sauce, drizzle that over the top of your pie filling now. Roll out the top crust and transfer to the pie. Trim edges to the diameter of your pie plate. Fold bottom crust overhang over the top crust, pinching to close around the edges. Crimp crust. Cut steam vents in the top crust (at least 4). Brush top crust with melted butter and then protect pie edge with tin foil.

IMG_1808

Bake at 400 for 30-35 minutes, removing the tin foil for the last 10, and turning up to broil for a minute or two at the very end to brown your top crust. Let cool slightly, and serve warm or at room temperature.

IMG_1809

Peach Pie.

Usually if someone asks me what my favourite pie is, I say that I have two favourites – peach and pumpkin. No vanilla ice cream, no whipped cream, just unadulterated peach pie and pumpkin pie. And while a good cherry pie may be inching its way into being a favourite also, I still think these two are holding strong. I love autumn a lot, and pumpkin pie seems like the most quintessential autumn thing, but still, there’s something I’ve always found to be extra special about peach pie.

IMG_1744

It’s probably no coincidence that the only pies I remember my grandmother Marnie (the pie guru whose pie-a-week advice I am undertaking here) making and serving us were peach and pumpkin. I don’t ever remember her making an apple pie, a strawberry rhubarb, or anything else for that matter. I’m sure that when she was younger and routinely made pies for dessert at Sunday night dinner that she made a much wider variety of pies than these two. But by the time she was in her late 70s and 80s, they are the only pies I remember her serving me. So surely I love these two pies the most because of emotional attachments and nostalgia and everything, though I also think they are truly the best pies. I think peach pie has always seemed extra special to me because for the many years in between when Marnie stopped baking pies and when I started, I never got to have peach pie. It’s not that common! I’m sure that in some places – like in Georgia or in Beverly Hills – peach pie may be more common. But I never saw a straight-up peach pie anywhere during all those years of longing for one. I actually think this is the reason I decided to learn how to make pie 4 years ago – I was tired of dreaming about a peach pie, I wanted one to be in my belly.

IMG_1747

Last year I think I made the best peach pie I’ve ever made. It’s the pie that is pictured in this blog’s header photo. Peach pie can be tricky because it gets REALLY soupy, because the peaches give off a lot of liquid, and if you’re not careful it will be peach soup with some pastry for garnish.

This pie turned into peach soup with some pastry for garnish.

IMG_1751

I am absolutely one of those people who gets very sad and frustrated by cooking and baking that doesn’t turn out how I want it. With most things like that, the answer is usually “it’s still going to taste good!”. I cut into this pie before it had cooled completely (I don’t think it would have made that much of a difference, it was still soupy later on) and was incredibly dismayed. This time, the whole “it will still taste good!” didn’t work for me – I knew it to be true, and it was true, and I was glad for that of course. But when you’re making a pie a week for an entire year, you want them to be better than that. And when most of your pies have been turning out pretty great, and then your favourite pie ever turns out kind of disastrous? I was very sad. I used a recipe that I don’t think I’ve used before, and I don’t think it called for quite enough thickener. And I may have rolled my crusts too thinly for such a wet pie, because they almost disintegrated. I wanted a do-over.

photo (23)

peach pie, round one. that beautiful exterior is hiding a soupy mess.

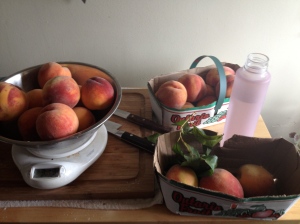
So, I made another one. Yes, this is the story of when I made two peach pies in one week. I didn’t make another peach pie right away, though. First, I internally sulked for 3 days, and then I wrote most of this blog post and realized that I would only feel better if I tried again, and hopefully succeeded. Now, it can be alarming how much my own feelings of self-worth sometimes seem to hinge on little things like the successful baking of a pie, but this was about more than that – this was about wanting to have my favourite pie before peach season ends. This is a project inspired by Marnie, so how could I let peach season slip by with only a sad soupy pie to show for it? This was emotional, nostalgic, important to me. I wrote most of this blog post, and then immediately decided to make a pie that day. I went out, bought 7 peaches and came home and started over.

cooling pie.

cooling pie.

Of course, first I needed to figure out – what did I do wrong the first time? I had a sneaking suspicion that I needed to include more thickener in the pie, so I did that. I tried to roll my crusts a little less thin, and I made sure they weren’t too sticky and that they were properly chilled. I’m sure it helped that I made the second version of this pie on a much cooler day. But when I found the peach pie recipe that I used the first time I ever made peach pie on my own – the America’s Test Kitchen, allegedly foolproof recipe – I found something that I think made a world of difference. LATTICE TOP. Now, I’ve made very good, non-soupy peach pies with a full top crust at least 2 or 3 times before, so I know it can be done. But, in addition to obviously being very pretty, the lattice top allows for maximum liquid evaporation while the pie bakes in the oven. There’s just wayyy more room for steam to escape, therefore allowing the liquidy centre to reduce and thicken as it cooks. Lattice top was the way to go, because I didn’t want to have a second failure in one week.

IMG_1762

And people, round two turned out GREAT. Really great. Paul claimed it had the perfect balance of tart and sweet. It wasn’t remotely soupy. The crust was crispy and flaky and beautifully browned. I’m eating a piece with my morning coffee as we speak, and I couldn’t be happier. 

peach pie, round two.

peach pie, round two.

Peach Pie – adapted from America’s Test Kitchen and Smitten Kitchen

  • one double crust pastry
  • 6-8 medium to large peaches (enough to make 7 cups sliced)
  • 1 Tbsp. lemon juice
  • 3 Tbsp. instant tapioca
  • 1/4 cup granulated sugar
  • 1/4 cup brown sugar
  • pinch of cinnamon
  • few gratings of fresh nutmeg
  • 1 egg, beaten for egg wash

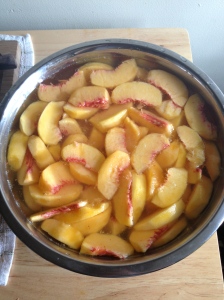
While your pastry is chilling, peel, pit, and slice your peaches. You can keep them in a bowl with water and lemon juice to keep them from browning while you work. Roll out your bottom crust, leaving an inch of overhang crust and then chill. Drain peaches, and combine them with the lemon juice, tapioca, both sugars, cinnamon, and nutmeg. Roll out top crust, cut into lattice strips. Put peach filling into bottom crust, and then assemble your lattice top crust. Trim lattice strip edges to the diameter of the pie, and then fold over bottom crust edge, pinching lattice strips with it. Crimp pie edge. Brush lattice top with egg wash, if using. Cover crust edge with tinfoil. Bake pie at 425 for 15-20 minutes, and then turn the temperature down to 375 for another 30-40 minutes. Let cool completely before cutting. ENJOY.

End of Summer Galette.

This galette is basically the lovechild of last week’s burst tomato pie and last month’s summer vegetable pie. I mean, I guess it’s much more like the second one, because the only thing really linking it to the burst tomato pie is the presence of corn. I hope that some of you are starting to go “Hey, this pie is just a bunch of vegetables thrown in a crust! That doesn’t seem that fancy!” – because it’s true! Pie doesn’t have to be fancy! Pie can (and should) be the vehicle for those nights when you don’t know what to have for dinner but have a bunch of vegetables in your fridge and don’t know what to do with them. It is seriously so easy to just cook up some veggies, slap em in a galette crust, and bake it with maybe some cheese. An unplanned dinner that tastes like something you spent lots of time thinking about and making? Best.

IMG_1717

But I am sorry if any of your are bored by the fact that I’ve posted a few very similar galettes in the last few weeks. I can’t help it! Keep in mind that I actually am EATING all of these pies, and I gotta give my belly what it wants – which is delicious summer veggies in a flaky crust, ideally with that feta I’ve told you about. I’ve called this pie an “end of summer galette”, because I made it at the start of Labour Day weekend. The thing I love about not being in school (or working in a school right now, since I’m a teacher) is that Labour Day weekend doesn’t mean a whole lot to me – except that in September a lot of things I might like to do will be far less crowded since so many people will have decided that summer is over. That said, I’m also never sad about summer ending. Autumn is really the best. This morning I woke up and put on a summer dress (actually it was my “house dress” which is a dress I wear like sweatpants all summer indoors and never wear out) but soon got quite chilly. I then said to Paul “I need socks and a sweater!” and very literally clapped my hands with glee while I said it. I’m going to dig out one of our afghans today to cozy under. IT’S ALL SO EXCITING.

IMG_1727

I’m sure you summer lovers are really groaning right now, but I can’t help it. Fall is the best and I don’t even hate winter either, I kind of love it. I am almost positive that summer is my least favourite season, except for all the awesome local fruits and vegetables. So anyways, this is all to say that while it’s not quite the end of summer yet (as this galette would suggest) it’s true that I may already be dancing on summer’s grave, celebrating its demise with pie.

End of Summer Galette – adapted from nobody, created by me. 

  • one single crust pastry
  • one small to medium eggplant
  • one red pepper
  • 1-2 ears of corn, cut off the cob
  • good feta
  • salt, pepper, and fresh basil if you have it
  • one egg, beaten for the egg wash (optional)
  • sesame seeds (optional)

Peel your eggplant and cut into smallish pieces, drizzle with a bit of olive oil and season with salt and pepper. Cut your red pepper in half, remove seeds and white membranes, and rub both sides with olive oil. Place in a roasting pan with the eggplant. Roast veggies at 400 for 20-30 minutes. The eggplant may be done before the pepper is really softened, so you can remove the eggplant to a plate when its cooked. When done, let the pepper cool and then cut into small pieces.

IMG_1741

egg washin’.

Meanwhile, sauté the corn in a pan with a bit of butter or olive oil for 3-5 minutes. Remove from heat. Crumble some feta into a small bowl.

When the eggplant, pepper and corn have cooled a bit (so that they are lukewarm but not hot), roll out your galette dough. Transfer to a parchment lined baking sheet. Spread the eggplant, then pepper, then corn onto the galette dough. Sprinkle with some shreds of torn basil and the crumbled feta. Fold up the dough edges to form a rustic circle, trying to make sure that you seal it so that there are no leaky edges. Brush the dough with the egg wash. On a whim, this time I decided to sprinkle the crust with sesame seeds after the egg wash. It was delicious. The presence of both the sesame seeds and the feta made me feel like I was eating spanakopita, and it seemed like my pastry was more flaky, almost like phyllo. Maybe sesame seeds someone make your pastry more flaky. Either way, I highly recommend this addition. Bake at 400 for 30 minutes or so, until done. DEVOUR.

IMG_1743

don’t mind if i do.

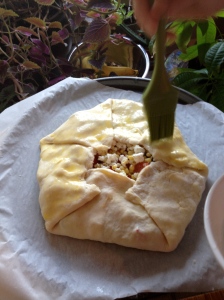
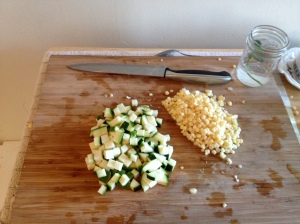
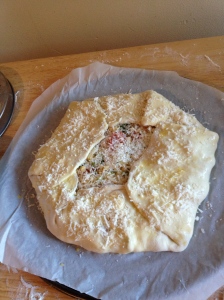
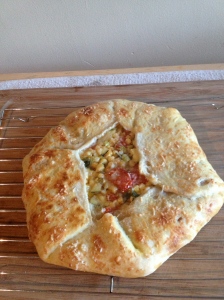
Burst Tomato, Zucchini, and Sweet Corn Galette.

This pie screams August.  Deb over at Smitten Kitchen posted this recipe while I was away in Portland, and when I got back and saw it I knew that it really needed no adaptations. So I didn’t make any. I mean, I used my own pastry recipe (though I can attest that her galette dough, with the lemon juice and sour cream, is really good). If I made this again, I think I would try it with a different cheese, because the parmesan was a kind of mellow in this, and I think I’d like it with some feta, or goat cheese, or maybe ricotta instead. But I have no complaints. Her recipe is great, and I encourage you all to make it before the corn is gone.

IMG_1694

What’s smart about this recipe is that you cook the tomatoes a bit in a pan before you bake your galette – otherwise they would burst in the oven, and all those tomato juices would lead to a very wet and leaky pie. This way, most of the juices escape in the pan, and get cooked down a bit into a bit of a thicker gravy, if you will. I think this burst-tomato concept would work just as well with other accompanying vegetables, which makes me happy because cherry or grape tomatoes are basically the only variety of fresh tomato that I will buy here in the off-season. You can still get small tomatoes like that here in the winter, that are local, and have likely been grown in a hothouse, and they are pretty good. I might try a variation of this pie out in the colder months, because little cherry tomatoes can go a long way when you’ve been relying on cruciferous and root vegetables for months (i LOVE cruciferous vegetables, in case that made you think otherwise).

IMG_1695

Burst Tomato, Zucchini, and Sweet Corn Galette – from Smitten Kitchen

  • one single crust pastry recipe, or Smitten Kitchen’s galette dough recipe
  • 1 pint of cherry or grape tomatoes
  • 1 ear of corn, sliced off the cob
  • about half of a large zucchini, or 1 small one, diced
  • 3-4 green onions, sliced
  • 1/2 cup grated parmesan, or another cheese of your choice (I don’t recommend cheddar, after the melty-oil fiasco of the Tex Mex Galette)
  • olive oil
  • salt and pepper and chili flakes, if you’re into that
  • one egg, beaten, for the egg wash (optional)

IMG_1698

Heat a pan with some olive oil and add the tomatoes. Cover the pan, because those babies are going to burst and you don’t want them shooting hot tomato juice all over yourself or your kitchen. You can stir occasionally, if you’d like. You’ll hear them start to pop in the pan, and once most of them have burst and are leaking their juices, you can remove the lid. Add the zucchini and cook for a few minutes. Season with salt, pepper, chili flakes, or any other spices you might like. Add the corn and cook for 1 minute, then mix in the green onions and remove from heat. Pour the vegetables onto a plate to cool for 20 minutes or so.

IMG_1700

When your filling has cooled, get out your dough and roll it out into a large circle. Transfer to a parchment lined baking sheet. Spoon your filling onto the pastry. Sprinkle with most of the parmesan cheese. Fold up the pastry edges to make a rustic pie. Brush with the egg wash, and sprinkle the remaining parmesan on the pastry (cheese crust!). Bake at 400 for 30-40 minutes, or until bubbly and well browned. Eat that delicious pie and savour the last breaths of summer.

IMG_1703